The Five Cs of Wire Wrapping Step 1 The Circle
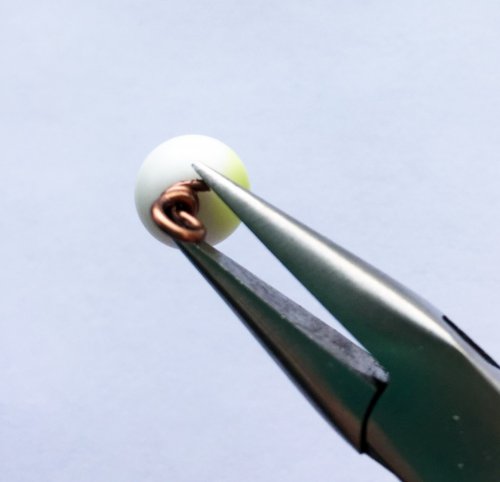
We're back with Step 1 of consistent wire wrapped loops: the circle. Creating the perfect circle means that the wire loop is centered over the wire. Notice the difference between the photos. One circle looks more like a backwards P while the other loop is a circle centered neatly over the rest of the wire.

To achieve this quality, your movements will alternate between the pliers and wire.
Step 1: Circle
Over the next 5 lessons, we'll create a wire wrapped segment with an 8mm bead in the middle. Start with a 3" piece of wire of any gauge.
Pliers: with the round nose pliers in your dominate hand, grab the wire approximately 1.25" from the end, holding the pliers so they are parallel to the table
Wire: push the wire away from you so it rests at a 90 degree angle (it will point directly away from you)
Pliers: holding onto the wire with your other hand, open the pliers and rotate them away from you 45 degrees. Close the pliers.
Wire: pull the wire towards you and around the top of the pliers (it will point straight down at the table)
Pliers: holding onto the wire with your other hand again, open the pliers and rotate them toward you 45 degrees. Close the pliers. The plier will return to its original position, parallel to the table.
Wire: Push the wire under the pliers on the right side (the tip side of the pliers). Left handed students may find it helpful to push the wire under on the left side, away from the tip of the pliers.
Why?
The act of rotating your pliers away from you is what creates the 45 degree bend in the wire at the point where the wire and circle meet. That bend centers the circle neatly over the wire, preventing it from looking like a P.
Pushing the wire underneath the pliers on the tip side means that in Step 3, when you start to wrap the coil, you will be wrapping towards you. I like to see what is coming! If you want to wrap away from you, push the wire underneath on the right side of the wire, away from the tip of the pliers.
Tip
If you want a consistent sized circle every time, mark your pliers with a Sharpie marker or a piece of masking tape. Even easier, consider purchasing a stepped round nose plier. These pliers have stepped jaws versus the graduated jaws of a standard pair of round nose pliers.
Materials

Wire
Tools

Round Nose Wire Plier
G2-507
- G2-507
- Lesson Quantity: 1.00 pieces
- Purchase Quantity: 1.00 each
- Price: $32.95
- Gold Club Price: $24.71
Optional Tools

C.H.P Milano Italian Flush Cutter, 5 1/2 Inches
PLR-487.00
- Lesson Quantity: 1.00 pieces
- Purchase Quantity: 1.00 each
- Price: $14.97
- Gold Club Price: $11.23

Ultimate wire-pliers Set
G15-20
- Lesson Quantity: 1.00 pieces
- Purchase Quantity: 1.00 each
- Price: $99.95
- Gold Club Price: $74.96
- Category: General Education
- Technique(s): Wrapping






 The Five Cs of Wire Wrapping Step 5 Clean
 The Five Cs of Wire Wrapping Step 4 Cover then Cut
  The Five Cs of Wire Wrapping Step 3 Coil
 The Five Cs of Wire Wrapping Step 2 Connect


