Wire Jewelry Display and Booth Ideas
By Dale Armstrong - I guess the best way to talk about this subject is to tell you my story. While I was working at a restaurant I began selling my jewelry to co-workers. A well-known artist, who lives locally, saw my work and invited me to participate in her nationally known art show. Of course I was excited and said yes!

Now, I have to stop here and tell you that this show was two weeks away and having only ever visited a variety of art shows and craft festivals around the country, I had no earthly idea as to what I was getting myself into! I had no tent, no display items, no 'anything' that I needed. So I turned to a co-worker (you now know as my friend and faculty member 'Stained Glass Lindi') and asked if she wanted to do the show with me, adding her beautiful glass pieces. She agreed and then admitted that she also was clueless about how to get things together.
The following weekend I paid a visit to another local show, just to 'walk it' with a different eye, looking at how vendors had their booths set-up, what type of tents were available, etc. Obviously I was supposed to get into this business, because when I stopped to question an older woodworker about his type of tent, he offered to sell it to me the next day (at show closing) for just $100 because he had decided to retire. OK, now I had a tent! And a good one at that, with metal bars you could 'chin' on. (And while the gentleman took it down, I had to number each of the zillion pieces with a magic marker so I knew how it went together again.)
Display items and tables were my next goal. I choose a wooden rack (the kind that goes on the back of a commode) to which I added lots of screw-in hooks so I could hang my hand-made earring cards. (Poster board cut with scissors and holes made with a small paper-punch, labeled also by hand.) At a local yard sale I picked up a couple of tall, plastic, soda displays and had my husband use his grinder to remove the logos and names. My main table was a fold-up aluminum one borrowed from Lindi, who had used it for years while doing wallpaper work (and it was more than a bit wobbly). A folding chair was borrowed from our travel trailer as well as a rug, and as I had worked for a direct sales company in the past, I had some great, blue tablecloths. We all thought I needed more color, so I draped a Mexican blanket over the blue. Now I had to find some type of cover for the holes in those soda displays, and as sewing is not my thing, I bought and cut some felt in the same colors as the blanket (no hemming necessary).
To display my pendants I just used U-shaped jewelry pins and attached each piece to the velvet boards I used inside my storage trays. Rings and bracelets went into the one glass topped box I had to keep cabochons in. All of the signage was made out of paper, printed on my computer, and then covered with adhering clear plastic (I think I found in the cabinet lining section of a department store). And although my very first business cards were quite sad, they did have my name and address on them, and a brief description of what I make and sell.
The result? Well, during that first three-day show I about sold out! I also received several show applications in the mail from other promoters who liked my work enough to invite me to participate in their show. Not bad for a two-week learning experience. Needless to say, over the years I became more professional with my set-up and displays, but not all at once! After all, this was my 'hobby business' and I was not going to take funds out of the household to make it happen. Rather, after every show I took my profits and purchased one or two more items (a lot of which I still use today).
The lesson from this experience is: you do not need a lot of expensive display items and professional equipment to get started! Look around your home, basement, garage and those of your family and friends. You will be amazed at what your imagination can do with a few simple items. After all, your jewelry is what people are coming to see and hopefully purchase.
Today one can begin participating in outdoor art and craft shows quite inexpensively due to the selection of affordable tents available from a variety of companies. Check your local department store or 'wholesale' club for some nice choices. If you are an outdoors person, you probably have a few good tarps that could be used to begin with, for no additional cost. Colored sheets make great table covers (I still use a lot of those today) and about every computer comes preloaded with a good design program so you can make your own business cards and signage.
Choosing the right show for your work is very important. If it is a local or 'drive' show (no hotel/motel necessary) and the booth fee is reasonable, sure, give it a shot. However I always advise my students to 'walk' a more expensive or 'travel 'show first. Yes this means not participating in it right away, but take the time to make the drive and check out the local area for restaurants and a decent place to spend the night, besides 'walking the show' to see what types of vendors and items are included, how the promoter seems to be handling things (or if you can even find them) and ask vendors questions. (More on this in a future article.)
Here are examples of different types of booth set-up and displays, according to the venue. This photo was taken at a high-end sci-fi con, where in addition to their gallery table, each juried artist also has the option of purchasing one 6-foot table. No, that's not a lot of space and it depends on what you are doing as to how to set it up. This costumed artist was using her space to demonstrate her art form that in turn generated customers interest, who then paid a visit to her gallery table and made their purchases from it. (Atlanta, GA)

This picture is of a display at an art gallery where the artist was 'the feature' and her work is only priced via a list in the customers program. (Boston, MA)

I don't know about you, but I have found that most people will NOT walk INTO a jewelry booth! (Maybe they are intimidated by thinking they have to purchase an item as admission or something.) To counter this situation (with the exception of my first 2 shows) I never set-up so people have to walk in! Instead, I set my tables up around the perimeter of my space, which puts a boundary between them and me. (Maybe they feel safer this way?) When they walk by my tables I just say 'Hi' and tell them 'what' they are looking at, describing my art form. If they are interested, I can always come around the tables to help them try things on. (Dothen, AL)

Yes, not being on the end of a booth row can limit your space if you set up around the perimeter, as you would only have about 10-feet of space. My solution to this challenge is to make my own aisle. (Virginia Beach, VA)

After many years of participating in shows all over the United States, I finally have one basic set-up that I now use all the time, with variations being made just by changing the table covers or the holiday theme, (and I still add one new display item every year). Life is good. (Bmghm, AL)

Yes, I like to have most of my work displayed in covered cases. Not only do cases prevent jewelry items from developing limbs and disappearing, but they also protect my work from dust and dirt. (You would be amazed to see how much lint and dust collects on the safety glass tops, within just a few hours 'indoors'!) And if you are wondering how I fill my cases, I choose to display my items by what I personally feel go together, rarely the same combination twice, and usually surround a higher priced item with a variety of mid to lower priced pieces. (I am also known for changing and moving the contents of my display cases around during a show.) Other folks like to group their work according to either color or material, and still others group by price. As seen in some of the above pictures, I also think that it is very important for customers to be able to freely pick up and try things on, so some of my bracelets are lying loose on my main table too.
You may also notice the little white squares along the edge of the cases. These are my prices. (I think tags are ugly and take away from the jewelry.) I cut small shapes from 3×5 cards and list the item name or the material it is made from and the price. (I know that if I walk into a jewelry store or booth and cannot see any prices, I think they are probably high and I couldn't afford them anyways.) By using these small cards I can also change the price whenever I want, and not have to worry about cutting and threading, etc.


The arena of display and booth set-up ideas is HUGE! This is just a sample of things I have tried that I hope may help those of you who are wondering in which direction to head while thinking about participating in shows, or those of you who are looking for a fresh idea. (And for all of those who have asked me for such an article via our 'tips' submission form, thanks!)
Stay 'Twisted'!
Dale/Cougar
Stay 'Twisted'!
Dale/Cougar
Materials

Wire

Beads

Cabochons
Tools

Display Items

Sale Frosted Sign - Sold Individually
G3-102
- G3-102
- Lesson Quantity: 1.00 pieces
- Purchase Quantity: 1.00 each
- Price: $2.57
- Gold Club Price: $1.93

Sterling Silver Frosted Sign - Sold Individually
G3-103
- G3-103
- Lesson Quantity: 1.00 pieces
- Purchase Quantity: 1.00 each
- Price: $2.57
- Gold Club Price: $1.93

6x5x5 Inch Black Velvet - Low Profile Neck Bust - Pack of 1
G1-111
- G1-111
- Lesson Quantity: 1.00 pieces
- Purchase Quantity: 1.00 each
- Price: $11.97
- Gold Club Price: $8.98

6x5x5 Inch White Faux Leather - Low Profile Neck Bust- Sold Individually
G1-110
- G1-110
- Lesson Quantity: 1.00 pieces
- Purchase Quantity: 1.00 each
- Price: $12.97
- Gold Club Price: $9.73

72 Ring Holder Insert Black Velvet Foam - Pack of 1
G1-2
- G1-2
- Lesson Quantity: 1.00 pieces
- Purchase Quantity: 1.00 each
- Price: $6.97
- Gold Club Price: $5.23

Black Velvet 2 Bar Earring Stand - 8 Pair
G1-606
- G1-606
- Lesson Quantity: 1.00 pieces
- Purchase Quantity: 1.00 each
- Price: $12.97
- Gold Club Price: $9.73

Double Finger Ring Display
G1-607
- G1-607
- Lesson Quantity: 1.00 pieces
- Purchase Quantity: 1.00 each
- Price: $5.57
- Gold Club Price: $4.18

T-Bar (Oval) Black Velvet Bracelet Display
G1-600
- G1-600
- Lesson Quantity: 1.00 pieces
- Purchase Quantity: 1.00 each
- Price: $13.97
- Gold Club Price: $10.48

White Faux Leather 2-Bar Multi-Earring Stand
G1-25
- G1-25
- Lesson Quantity: 1.00 pieces
- Purchase Quantity: 1.00 each
- Price: $12.97
- Gold Club Price: $9.73

White Faux Leather Earring Stand (20 Pair)
G1-41
- G1-41
- Lesson Quantity: 1.00 pieces
- Purchase Quantity: 1.00 each
- Price: $4.97
- Gold Club Price: $3.73

White Faux Leather Medium Heart Shape Necklace Stand - Pack of 1
G1-31
- G1-31
- Lesson Quantity: 1.00 pieces
- Purchase Quantity: 1.00 each
- Price: $4.97
- Gold Club Price: $3.73

The Definitive Guide to Selling Handcrafted Jewelry
definitive_guide
- definitive_guide
- Lesson Quantity: 1.00 pieces
- Purchase Quantity: 1.00 each
- Price: $177.95
- Gold Club Price: $133.46
- Category: Selling
- Technique(s): Selling






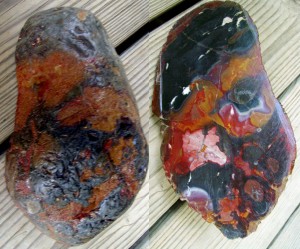 Gem Profile- Beautifully Colored Jasper
 Gem Profile- Common Opal
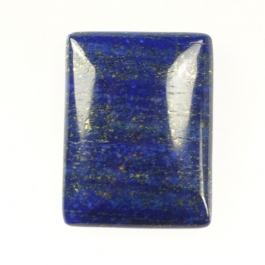 Gem Profile- Lapis Lazuli
 Wire Sculpture Expert Dale -Cougar- Armstrong Interview
 Getting Twisted - Jewelry Making Tools
 How to Price Your Wire Jewelry
 How to Measure Gemstones for Settings
 Cool Anklets are HOT
 Inspiration Comes from Everywhere and Every Thing
 Where to Sell Your Wire Jewelry
 How to Choose Wire Temper for Making Jewelry
 What Gauge of Wire Should I Use to Make Jewelry
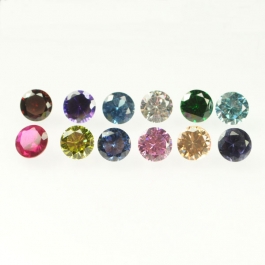 What's a Cubic Zirconia Stone
 Rockhounding - A Beginner's Guide
 What Shape of Wire Should I Use to Make Jewelry
 Gem Profile- Bloodstone
 Gem Profile- Picture Jasper
 Gem Profile- Patterned Jaspers
 Gem Profile- What is Jasper
 Gem Profile- Quartz Introduction
 Gem Profile- Wishful Turquoise
 Gem Profile- Amethyst
 Gem Profile- Fluorite
 Gem Profile- Obsidian
 Gem Profile- Rose Quartz
 Gem Profile- Smoky Quartz
 Gem Profile- Citrine and Ametrine
 Gem Profile- Labradorite
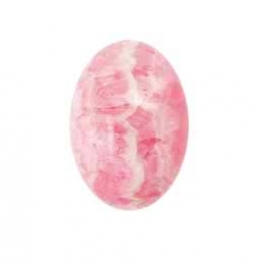 Gem Profile- Rhodochrosite
 Gem Profile- Moonstone
 Gem Profile- Prehnite
 Gem Profile- Jade
 Gem Profile- Amazonite
 Gem Profile- Corundum
 Gem Profile- Quartz with Inclusions Part 1
 Gem Profile- Quartz with Inclusions Part 2
 Gem Profile- Aventurine
 Gem Profile- Macrocrystalline Quartz
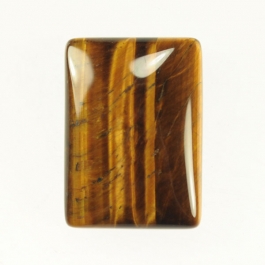 Gem Profile- Tiger Eye
 Gem Profile- Fire Agate and Iris Agate
 Gem Profile- Amber
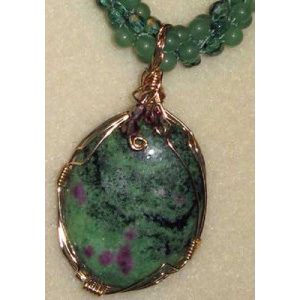 Gem Profile- Ruby Zoisite
 Gem Profile- Ruby Fuchsite
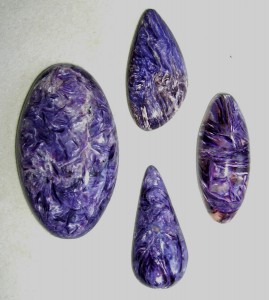 Gem Profile- Charoite
 Gem Profile- Moldavite
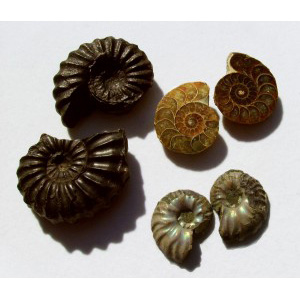 Gem Profile- Ammolite
 Gem Profile- White Precious Opal
 Gem Profile- Opalized Fossils
 Gem Profile- Boulder Opal
 Gem Profile- Black Precious Opal
 Gem Profile- Pyrite
 Gem Profile- Opal Introduction


