- Wire
- Sheet
- Tools
- DVDs
- Streaming Video
-
Beads
- Handmade Venetian Glass Beads
-
Shop by Gemstone
- Agate - Blue Crazy Lace
- Agate - Blue Lace
- Agate - New Brazilian
- Agate - Pink Crazy Lace
- Agate - Purple Crazy Lace
- Agate - Rainforest
- Agate - Turritella
- Amethyst
- Amethyst - Dog Teeth
- Apatite - Blue
- Bronzite
- Carnelian
- Carnelian - Matte
- Cat's Eye
- Chrysocolla
- Dumortierite
- Dumortierite - Purple
- Goldstone - Blue
- Goldstone - Brown
- Goldstone - Green
- Hematite
- Jade
- Jade - New Burma
- Jade - West African
- Jade - Yellow
- Jasper - Apple
- Jasper - Black Silver Leaf
- Jasper - Dragons Blood
- Jasper - Green Brecciated
- Jasper - Imperial
- Jasper - Iron Zebra
- Jasper - Mexican Red Snowflake
- Jasper - Noreena
- Jasper - Picasso
- Jasper - Picture
- Jasper - Porcelain
- Jasper - Red Creek
- Jasper - Red Creek - Matte
- Jasper - Red Porcelain
- Jasper - Venus
- Jasper - White Lace Red
- Jasper - Wildhorse
- Labradorite
- Lapis
- Malachite
- Obsidian - Golden
- Obsidian - Snowflake
- Onyx
- Onyx - Matte
- Orange Sodalite
- Prehnite
- Pyrite
- Quartz - Blue Green
- Quartz - Cherry
- Quartz - Rose
- Quartz - Smoky
- Rhyolite
- Rhyolite - Bird's Eye
- Sardonyx
- Seraphinite
- Sodalite
- Tiger Eye
- Tiger Eye - Blue
- Tiger Eye - Red
- Turquoise - African
- Turquoise - Yellow
- Pearls
- Swarovski Crystal Beads

- Stones & Supplies
- On Sale Now


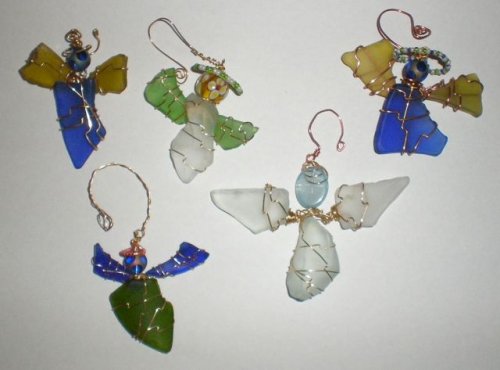

Crazy Christmas Star Pattern
- Category: Holiday Designs
- Technique(s): Coiling, Cutting, Hole Punching, Texturing
- Skill Level: Intermediate
Special Instructions: This week I came across this very simple metal working pattern and I think you'll love! You can either create the stars from scratch or use pre-cut metal shapes. They would make great Christmas tree ornaments or wonderful gifts for friends and neighbors.
This great little project is fun for the experienced and beginner alike and can lend itself to adaptions of your own design!
Enjoy!
This great little project is fun for the experienced and beginner alike and can lend itself to adaptions of your own design!
Enjoy!
Materials

20 Gauge 0.032 Dead Soft Red Brass Sheet Metal - 6x6 Inch
MET-704.20
- Lesson Quantity: 3.00 inches
- Purchase Quantity: 1.00 each
- Price: $10.08
- Gold Club Price: $7.56

16-gauge 6mm ID round Copper jump rings
- Lesson Quantity: 1.00 pieces
- Purchase Quantity: 1.00 each

18 Gauge Round Half Hard Copper Wire
H11-18H
- Lesson Quantity: 3.00 inches
- Purchase Quantity: 1.00 1FT
- Price: $0.65
- Gold Club Price: $0.49

18 Gauge Round Half Hard Nickel Silver Wire
H7-18H
- Lesson Quantity: 3.00 inches
- Purchase Quantity: 1.00 1FT
- Price: $1.02
- Gold Club Price: $0.77
Tools

Safety Glasses
G21-1
- G21-1
- Lesson Quantity: 1.00 pieces
- Purchase Quantity: 1.00 pieces
- Price: $2.97
- Gold Club Price: $2.23
Leather gloves
- Lesson Quantity: 1.00 pieces
- Purchase Quantity: 1.00 each

Xuron Sheer - Non Serrated
SHR-691.81
- SHR-691.81
- Lesson Quantity: 1.00 pieces
- Purchase Quantity: 1.00 each
- Price: $24.97
- Gold Club Price: $18.73

6 Piece Assorted File Set with Wooden Handle
G14-7
- G14-7
- Lesson Quantity: 1.00 pieces
- Purchase Quantity: 1.00 each
- Price: $5.57
- Gold Club Price: $4.18

Assorted Stamps

Large Rawhide Hammer 1 1/2 inch - Pack of 1
G3-50
- G3-50
- Lesson Quantity: 1.00 pieces
- Purchase Quantity: 1.00 each
- Price: $29.57
- Gold Club Price: $22.18

Brass Hammer - 1 Pound
HAM-456.10
- HAM-456.10
- Lesson Quantity: 1.00 pieces
- Purchase Quantity: 1.00 each
- Price: $24.97
- Gold Club Price: $18.73

Bench Block Helper with Steel and Nylon Blocks
DAP-500.30
- DAP-500.30
- Lesson Quantity: 1.00 pieces
- Purchase Quantity: 1.00 each
- Price: $28.95
- Gold Club Price: $21.71

Euro Tool Metal Hole Punch Pliers, 1.8 Millimeters
PLR-133.50
- PLR-133.50
- Lesson Quantity: 1.00 pieces
- Purchase Quantity: 1.00 each
- Price: $14.97
- Gold Club Price: $11.23

Large Shaping Block w/2 Depressions
DAP-150.00
- DAP-150.00
- Lesson Quantity: 1.00 pieces
- Purchase Quantity: 1.00 each
- Price: $33.97
- Gold Club Price: $25.48
JUMBO WOOD DAPPING PUNCHES
DAP-142.00
- DAP-142.00
- Lesson Quantity: 1.00 pieces
- Purchase Quantity: 1.00 each

Chain Nose Wire Plier
G2-508
- G2-508
- Lesson Quantity: 1.00 pieces
- Purchase Quantity: 1.00 each
- Price: $32.95
- Gold Club Price: $24.71

Flat Nose Wire Plier
G2-506
- G2-506
- Lesson Quantity: 1.00 pieces
- Purchase Quantity: 1.00 each
- Price: $32.95
- Gold Club Price: $24.71

Round Nose Wire Plier
G2-507
- G2-507
- Lesson Quantity: 1.00 pieces
- Purchase Quantity: 1.00 each
- Price: $32.95
- Gold Club Price: $24.71

Wood Handle Metal Brush, Brass
BRS-968.00
- BRS-968.00
- Lesson Quantity: 1.00 pieces
- Purchase Quantity: 1.00 each
- Price: $9.57
- Gold Club Price: $7.18

Brilliant Polishing Cloth 12x8 Inches - Pack of 1
G9-64
- G9-64
- Lesson Quantity: 1.00 pieces
- Purchase Quantity: 1.00 each
- Price: $4.57
- Gold Club Price: $3.43

C.H.P Milano Italian Flush Cutter, 5 1/2 Inches
PLR-487.00
- PLR-487.00
- Lesson Quantity: 1.00 pieces
- Purchase Quantity: 1.00 each
- Price: $14.97
- Gold Club Price: $11.23
Instructions
Step 1
Cut out a paper star pattern with scissors and trace it onto your sheet metal using a permanent marker. Then, using metal shears, cut the star fromthe sheet metal. You can also use a Pre-cut Metal star shape. If so, simply follow the steps for necessary for adding your own designs!

Step 2
Place the star, curved side down, on a steel block. Tap it with a rawhide hammer until it is flat. File the edges of the star with a metal hand file until they are smooth. An acrylic nail file is helpful for a final sanding.
Pro Tip: Tool Tip: When using a hand file, remember to file in the opposite direction from which the teeth run. That is, make contact with the metal as the file moves away from you, using a pushing motion.

Step 3
Using a metal stamp of your choice, hammer a design into the surface of your metal star. Tool Tip: A dead blow brass hammer works best when striking metal stamps–it is less likely to slip and the weight of the hammer will make your strikes more effective. It is often helpful to practice stamping your design on a scrap piece of metal. Hold the stamp perpendicular to the surface of the metal and strike solidly. It is best to strike once, but you may find it necessary to strike several times. If so, be sure to hold the stamp firmly so that it does not move, making multiple images of your design.

Step 4
Using a soft brass brush, polish the surface of the star, holding it on the steel block as shown. Then, wrap a Polishing Cloth around a flexible acrylic nail file and firmly buff the star to a bright shine with the cloth.
Pro Tip: Tool Tip: For a high luster and flawless shine, your star may be tumble polished in a Lortone Tumbler with mixed stainless steel shot and a few drops of Super Sunsheen Burnishing Compound.

Step 5
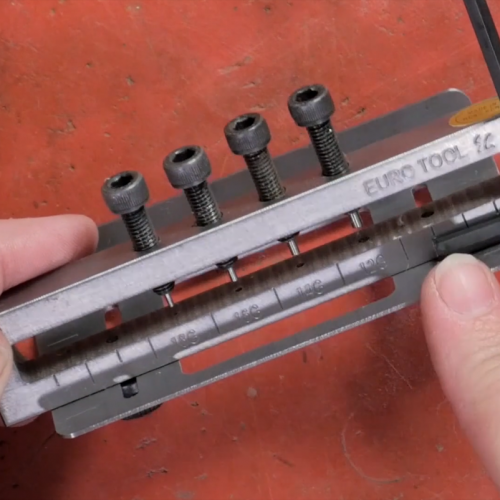
After marking the appropriate place with a permanent marker, use Punch Pliers (1.80mm) to put a hole in the top of the star. Tool Tip: EuroPunch Pliers are ideal for punching a hole in your star. These pliers can easily handle 24-gauge metal while allowing easy placement of the hole in just the right spot. These pliers also come in a 1.25mm size.

Step 6
Place your star with the stamped side down in the hollow of a large, shallow dapping block. Using a wooden punch and hammer as shown in the picture, begin forming the star into a gently curved shape.

Step 7
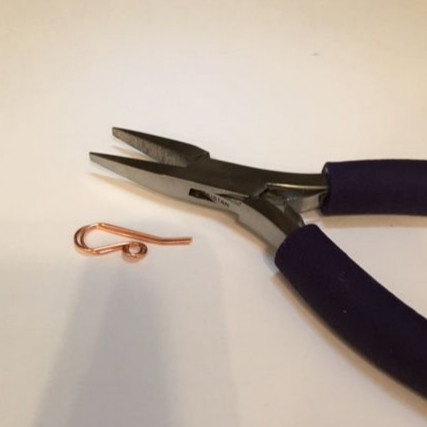
Using Flush Cutters, flush cut one end of a piece of dead soft18-gauge wire. To flush cut, place the flat side of the flush cutter blades toward the piece of wire that you want to use and the “v” of the blades toward that wire that you will not use to make the coil.

Step 8
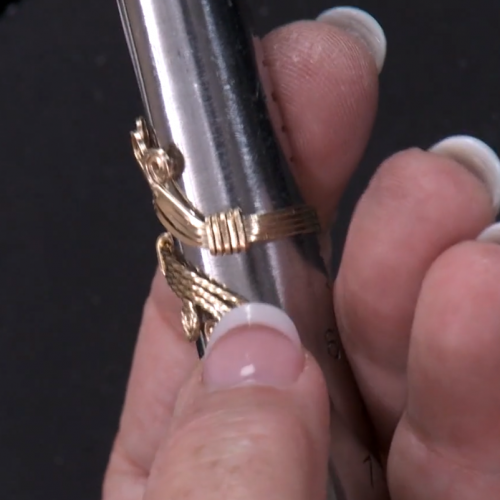
Using Round Nose Pliers, begin forming a round coil. Once you have made a complete revolution, gently but firmly hold the loop deep in the jaws of your Medium or Wide Flat Nose Pliers and continue coiling for about 2.5 revolutions.
Pro Tip: Tool Tip: It is important to use only the amount of pressure necessary to hold the wire as you coil it so that marring will not occur.

Step 9
With your Round Nose Pliers, make the desired number of curves to finish the coil. Lastly, make a loop on the end of the wire so that you can hang the star from a jump ring.

Step 10
Connect the coil to the star using a 16-gauge jump ring that is 6.0mm inside diameter. This jump ring will also serve as a bail for hanging the star.
You have completed the Crazy Christmas Star!
I hope you’ve enjoyed this little tutorial. Think of all the wonderful shapes you could create and make into ornaments and gifts! Send us pictures of your completed designs – we’d love to see them.

Supply Detail
loading...
Change Metal:
This Pattern requires:
Purchase quantity:
Price: $
Gold Club Price: $
Purchase quantity:
Price: $
Gold Club Price: $
Other Patterns by Judy Ellis
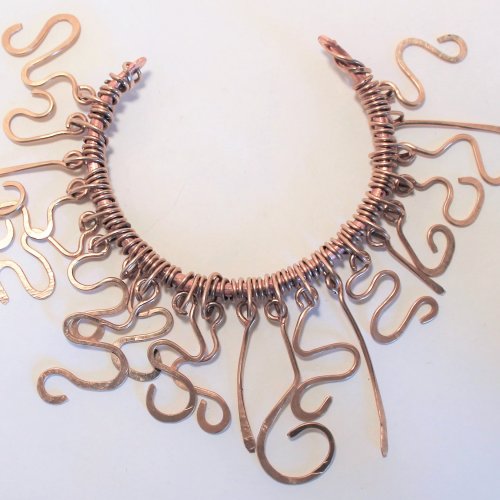
 Coiled Wire Daisy Bracelet
![]()
The premier place for all your jewelry making needs. The best in wire, tools, cabochons, gemstone beads and more. As well as a superior resource for educational support to help build your jewelry making skills and techniques.
Connect With Us


® 2007 - 2025 JewelryMaking.com Powered by ClaimTheWeb Cart

4.7
JewelryMaking.com
45619 Reviews
