
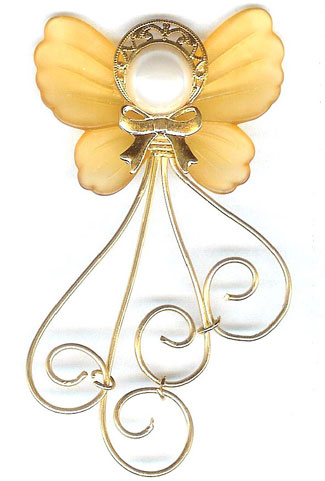
Heaven Rejoices Angel Pin
- Category: Classic
- Technique(s): Wrapping
- Skill Level: Beginner
Making this angel should be fun and easy and can be made in a jiff. Feel free to substitute pieces from your own jewelry box or parts on hand. Come as close to these as you can. Don't have the right parts? Most craft stores carry pieces you'll find that are just perfect for the project. It is easily adaptable to copper, gold, bronze, brass, silver - any wire.
Materials

21 Gauge Half Round Half Hard .925 Sterling Silver Wire
H8-21HRH
- Lesson Quantity: 7.00 inches
- Purchase Quantity: 1.00 1FT
- Price: $1.11
- Gold Club Price: $0.84

22 Gauge Square Dead Soft .925 Sterling Silver Wire
H8-22SQD
- Lesson Quantity: 27.00 inches
- Purchase Quantity: 1.00 5FT
- Price: $11.12
- Gold Club Price: $8.34

Butterfly: 35mm by 25mm
- Lesson Quantity: 1.00 pieces
- Purchase Quantity: 1.00 each

14mm pearl cabochon
- Lesson Quantity: 1.00 pieces
- Purchase Quantity: 1.00 each

6mm Aquamarine 5000 Round Swarovski Crystal Beads - Pack of 10
A13-84B
- Lesson Quantity: 4.00 pieces
- Purchase Quantity: 1.00 each
- Price: $4.97
- Gold Club Price: $3.73

3 agua aluminum roses: 4mm to 6mm
- Lesson Quantity: 3.00 pieces
- Purchase Quantity: 3.00 each

Tie tac back finding
- Lesson Quantity: 1.00 pieces
- Purchase Quantity: 1.00 each
Tools

Chasing Hammer with Wooden Handle, 1 1/8 Inch Face
G3-27
- G3-27
- Lesson Quantity: 1.00 pieces
- Purchase Quantity: 1.00 each
- Price: $13.97
- Gold Club Price: $10.48

C.H.P Milano Italian Flush Cutter, 5 1/2 Inches
PLR-487.00
- PLR-487.00
- Lesson Quantity: 1.00 pieces
- Purchase Quantity: 1.00 each
- Price: $14.97
- Gold Club Price: $11.23

E6000 Adhesive Glue 3.7 oz. - Pack of 1
G16-18
- G16-18
- Lesson Quantity: 1.00 pieces
- Purchase Quantity: 1.00 each
- Price: $9.57
- Gold Club Price: $7.18

Chain Nose Wire Plier
G2-508
- G2-508
- Lesson Quantity: 1.00 pieces
- Purchase Quantity: 1.00 each
- Price: $32.95
- Gold Club Price: $24.71

Flat Nose Wire Plier
G2-506
- G2-506
- Lesson Quantity: 1.00 pieces
- Purchase Quantity: 1.00 each
- Price: $32.95
- Gold Club Price: $24.71
Instructions
Step 1
Align the four 7" wires with the twisted wires on the outside, straight wires on the inside and use the 1/2 round wire to make a bundle 1/2" from the top. Wrap 5 times to secure the wires.

Step 2
Measure 1 3/4" from the top wrap. Using the half round wire, make 3 wraps. Then measure 2 3/4" from the top bundle and make 3 more wraps, again using the 1/2 round wire.

Step 3
Holding the wire at the 1 3/4" wrap, very gently bend the 4 wires to make a horse-shoe. The wrap at 1 3/4" should be level with the wrap at 2 3/4".

Step 4
Thread your first bead on the twisted wire and secure with 2 wraps on the opposite side about 3/4" up from the 1 3/4" wrap

Step 5
Thread your second bead on the straight wire and secure, using 2 wraps, on the opposite side about 1/8" from the last.

Step 6
Thread your third bead on the other straight wire and secure, using 2 wraps, on the opposite side about 1/8" from the last wrap.

Step 7
Thread your 4th bead on the twisted wire and secure, using 2 wraps, just under the bundle of wires at the top.

Step 8
Flush cut the extra wire at the end of the bundle so that 1/4" of extra wire shows. You will use this to glue to the butterfly in the next step.

Step 9
Glue the angel's skirt to the front of your wings with E-6000 glue. Wait at least 1-1/2 hours for the glue to dry before going on to the next step.

Step 10
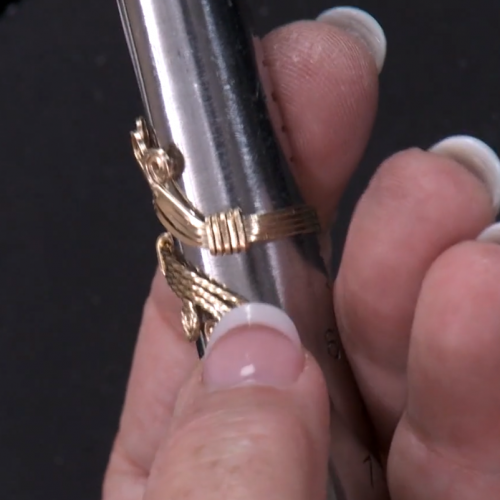
Now for the halo. Take the 3" piece of twisted wire and form around a round object. I found a round pencil was too small so I used an empty tube that holds seed beads. Use something about the same size as your cab or button. Now twist.

Step 11
Flatten the stem of the halo with your flat nose pliers or jeweler's hammer. It needs to be as flat as possible so the cab can glue evenly.

Step 12
Glue the cab you've chosen to the halo stem using the E-6000. Wait at least 1-1/2 hours for the glue to dry before going on to the next step.

Step 13
Glue the halo-face combination to the wings using E-6000 glue. Wait at least 1-1/2 hours for the glue to dry before going on to the next step.

Step 14
Glue the roses to the angel just under her head using E-6000. Wait at least 1-1/2 hours for the glue to dry before going on to the next step.

Step 15
Glue the tie tac just behind the head using E-6000. Wait at least 1-1/2 hours for the glue to dry.

Step 16
Wear and Enjoy!






 Bound for Glory Angel Pin
 Lighting the Way Angel Pin


