- Wire
- Sheet
- Tools
- DVDs
- Streaming Video
-
Beads
- Handmade Venetian Glass Beads
-
Shop by Gemstone
- Agate - Blue Crazy Lace
- Agate - Blue Lace
- Agate - New Brazilian
- Agate - Pink Crazy Lace
- Agate - Purple Crazy Lace
- Agate - Rainforest
- Agate - Turritella
- Amethyst
- Amethyst - Dog Teeth
- Apatite - Blue
- Bronzite
- Carnelian
- Carnelian - Matte
- Cat's Eye
- Chrysocolla
- Dumortierite
- Dumortierite - Purple
- Goldstone - Blue
- Goldstone - Brown
- Goldstone - Green
- Hematite
- Jade
- Jade - New Burma
- Jade - West African
- Jade - Yellow
- Jasper - Apple
- Jasper - Black Silver Leaf
- Jasper - Dragons Blood
- Jasper - Green Brecciated
- Jasper - Imperial
- Jasper - Iron Zebra
- Jasper - Mexican Red Snowflake
- Jasper - Noreena
- Jasper - Picasso
- Jasper - Picture
- Jasper - Porcelain
- Jasper - Red Creek
- Jasper - Red Creek - Matte
- Jasper - Red Porcelain
- Jasper - Venus
- Jasper - White Lace Red
- Jasper - Wildhorse
- Labradorite
- Lapis
- Malachite
- Obsidian - Golden
- Obsidian - Snowflake
- Onyx
- Onyx - Matte
- Orange Sodalite
- Prehnite
- Pyrite
- Quartz - Blue Green
- Quartz - Cherry
- Quartz - Rose
- Quartz - Smoky
- Rhyolite
- Rhyolite - Bird's Eye
- Sardonyx
- Seraphinite
- Sodalite
- Tiger Eye
- Tiger Eye - Blue
- Tiger Eye - Red
- Turquoise - African
- Turquoise - Yellow
- Pearls
- Swarovski Crystal Beads

- Stones & Supplies
- On Sale Now


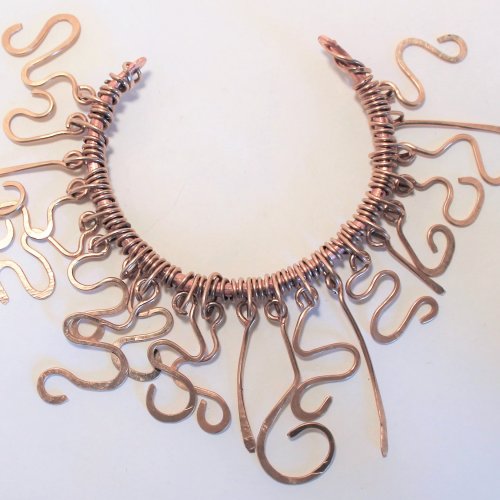


Infinity Cuff
- Category: Contemporary
- Technique(s): Coiling, Lashing, Wrapping
- Skill Level: Intermediate
Special Instructions: Use the nylon jawed pliers to pull on the 22 gauge sterling silver wire as you work and the chain nose to flatten the wire gently.
Materials

14 Gauge Square Dead Soft Copper Wire
H11-14SQD
- Lesson Quantity: 7.00 feet
- Purchase Quantity: 1.00 10FT
- Price: $23.01
- Gold Club Price: $17.26

16 Gauge Square Dead Soft Yellow Brass Wire
H1-16SQD
- Lesson Quantity: 3.00 feet
- Purchase Quantity: 1.00 5FT
- Price: $9.71
- Gold Club Price: $7.28

21 Gauge Half Round Antique Copper Enameled Craft Wire - 21 ft
H5-Q21HR-21FT
- Lesson Quantity: 2.00 pieces
- Purchase Quantity: 2.00 each
- Price: $7.00
- Gold Club Price: $5.25
Optional focal bead of your choice
Tools

C.H.P Milano Italian Flush Cutter, 5 1/2 Inches
PLR-487.00
- PLR-487.00
- Lesson Quantity: 1.00 pieces
- Purchase Quantity: 1.00 each
- Price: $14.97
- Gold Club Price: $11.23

3 Step Wire Looping Plier for Wire Wrappers
G2-153
- G2-153
- Lesson Quantity: 1.00 pieces
- Purchase Quantity: 1.00 each
- Price: $10.57
- Gold Club Price: $7.93

Flat Nose Nylon Flat Jaw With Spring
PLR-831.00
- PLR-831.00
- Lesson Quantity: 1.00 pieces
- Purchase Quantity: 2.00 each
- Price: $13.80
- Gold Club Price: $10.35

Chain Nose Wire Plier
G2-508
- G2-508
- Lesson Quantity: 1.00 pieces
- Purchase Quantity: 1.00 each
- Price: $32.95
- Gold Club Price: $24.71

6 Inch Metal Ruler - in Inches And Centimeters
G7-7
- G7-7
- Lesson Quantity: 1.00 pieces
- Purchase Quantity: 1.00 each
- Price: $2.57
- Gold Club Price: $1.93

Needle File Set Pack of 5
FIL-970.00
- FIL-970.00
- Lesson Quantity: 1.00 pieces
- Purchase Quantity: 1.00 each
- Price: $11.57
- Gold Club Price: $8.68

Scotch 3/4 Inch Painters Tape for Taping Wires Together
G13-5
- G13-5
- Lesson Quantity: 1.00 pieces
- Purchase Quantity: 1.00 each
- Price: $5.97
- Gold Club Price: $4.48

Miniature off Brand Channel Locks.
- Lesson Quantity: 2.00 pieces
- Purchase Quantity: 2.00 each
Instructions
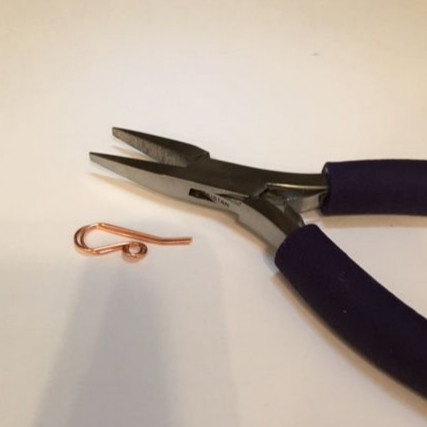
Step 1
Pro Tip: Measure wrist: for a 5 1/2 to 6 inch wrist, use 10, 2 inch copper pieces. For 6 1/2 to 8 inch, use 12, 2 inch copper pieces. For 5 1/2 to 6 inch use 10, 2 inch twisted brass, and for 6 1/2 to 8 use 12, use 2 inch twisted brass.
Cut 4, 7 1/2 inch pieces of 14 gauge copper wire. Trim sharp ends with flush cutters and file ends. Straighten all 4 pieces copper wire.

Step 2
Cut 10 or 12 pieces of the 14 gauge copper wire in 2 inch pieces depending on the size cuff you are making. Trim edges with flush cutter before you cut each new piece. File ends flat.
Step 3
Cut 10 or 12 pieces of dead soft brass in 2 inch pieces depending on the size cuff you are making. Trim edges with flush cutter before you cut each new piece. File ends flat.
Step 4
Twist dead soft brass 2 inch pieces, using 2 miniature Channel Locks.


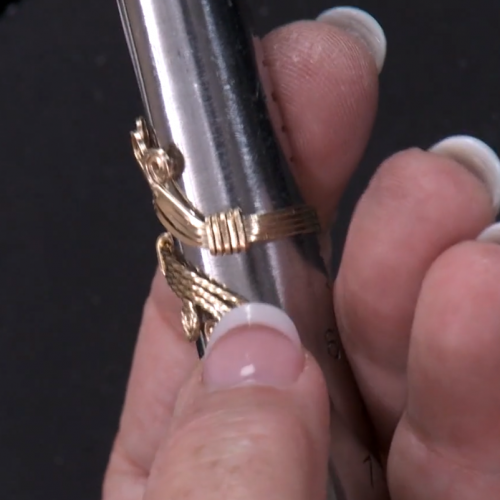
Step 5
Using Three Step Barrel Nose pliers at the largest barrel, place the end of the first 2 inch piece and curl it until the end touches the base of wire. Turn the piece of wire over and repeat the curl in the opposite direction to create the first infinity curl. Repeat on all 2 inch pieces of both copper and brass wire.


Step 6
Mark the 7 1/2 inch pieces at the center (3 3/4). This will be your starting point in Step 7.
Step 7
On your center mark (3 3/4) with right sides out and wrong side touching the center, use your fingers and pinch the wire together. The wire will form a natural crossing; one will go left and the other right. Then wrap the wire evenly on both sides for a total of 8 wraps, while staying on center.
Pro Tip: Important note for a 6 inch or smaller wrist size: for a small wrist place 15 wraps in center, before adding Infinity piece.
Step 8
Cut a 2 foot piece of half round wire. Leave your first piece of wiret facing up. With your next 2 foot piece of wire, you want to be sure you are going in the same direction. Do not cut your smaller pieces until you have wrapped the next circle on the Infinity first. This insures no accidental movement of wire. Then trim and fold over bar getting them to butt up against each other on the bar. You can then cut all of the smaller pieces needed to make your cuff.
Pro Tip: How to splice your wire. Make sure your splice is on the inside, and by that I mean not facing outward on the edge of cuff where it will catch and unravel.
Step 9
On your center mark (3 3/4) with right sides out and wrong side touching the center, use your fingers and pinch the wire together. The wire will form a natural crossing; one will go left and the other right. Then wrap the wire evenly on both sides for a total of 8 wraps, while staying on center.
Pro Tip: Important Note for 6 inch or smaller wrist size - For a small wrist place 15 wraps in center, before adding Infinity piece.

Step 10
Pick up your first infinity piece and place close to the wire already wrapped around the 7 1/2 inch piece of wire. Wrap the Infinity at the bottom of the circle 3 times. Use nylon jawed pliers to pull the wire tight after each wrap around the circle. Wrap the bar 15 times or the amount that fit perfectly in between your circles of the Infinity. Wrap the circle of the Infinity on the other end 3 times. Now wrap the bar 7 times and repeat 2 more times. Do not wrap more than five times after last circle, we will finish that later,


Step 11
Once again start in center with 8 wraps of 21 gauge half round wire; this is where you will determine a right and wrong side. On the right side, your wire goes under to catch the middle of the first circle and up to add the next layer of the Infinity circle. On the left side, you catch the next layer of the Infinity circle from the top down. We are standing the twisted infinity symbols on end. Follow Step 9 for the large or small cuff. Make sure that one end of the infinity symbols are facing each other on the top or bottom and continue this thru out this layer.


Step 12
Tape one side just to keep in place as you begin next layer.
Step 13
Work the next layer using the copper infinity symbols to match the first layers pattern, keep in mind the right and wrong sides.


Step 14
Now with the last bar once again wrap the center 8 times. Wrap the Infinity circle 3 times, 15 inches between the next circle. Wrap 8 times and repeat until all 3 on the first side are joined, flip and repeat.
Step 15
Now is when we determine size of cuff. Your Infinity area should be 5 1/2 inches at this point. With 1 inch left on both sides. And 3/8 of an inch in between the 7 1/2 inch bars. You can go from 5 3/4 inch size to 7 1/8 inch, depending on what size you cut the bars. Mark a half inch size smaller than you need across both sides with a ruler.


Step 16
Bend all 4 of the the 14 gauge bars in toward center of piece on both sides, one at a time. Start with the outer bars first.

Step 17
Trim off any excess wire at a 45 degree angle so they butt up against each other on the 2 outer bars. Cut an opposing 45 degree angle on the middle 2 bars on both sides. File if needed to fit together evenly.

Step 18
On the inside of the bent 14 gauge wire, use the half round wire to line the inside going all the way around inside, making sure each and every one is a squared "u". The flat side of the half round to the inside so it lays flat against 14 gauge. Use small pieces of tape to hold the wire in place. Place tape as close as you can to the end where the bend in the 14 gauge wire is. Tape in these areas will hold your pieces in place as you work. Try to get it as close to a squared "u" as possible.


Step 19
On the inside, pull the center wires tight and wrap the "u" shaped wires in the center 2 on each side. Wrap the wire three quarters of the way up making sure that the "u" shaped wires stay in the center of the 14 gauge wire.
Step 20
Pull the wires tight on the outer bars and cut the wire and make sure the wire is laying half way around the inside of the 14 gauge bar.
Step 21
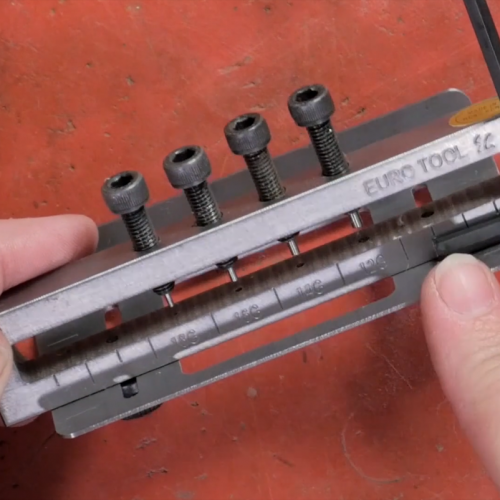
Cut 2, 14 gauge bars to 1 3/4 inches. File ends flat and tape to the ends in the center.
Step 22
Cut 4, 5 inch sections of 21 gauge wire. Tape 2 together side by side, making sure flat sides are on same side. Repeat with the other 2 half round wires.

Step 23
Place one of the two taped half round bundles on the side of the 14 gauge wire on the outside edge. Flat sides of half round wire touching against the 14 gauge wire and tape close to the top of bend.
Step 24
Cut a 3 1/2 foot section of 21 gauge half round wire.
Step 25
Start on one side and wrap the 14 gauge with the "u" shape and the doubled 21 gauge half round wires together.
Pro Tip: You'll want to start a little further up than where the cut is for easier wrapping and leave a small tail to trim for splice later.
Wrap 3 or 4 times then slide down to meet the cut.
Step 26
Continue wrapping around as tight and close as you can. When you come to the bend, use your fingers or chain nose pliers to make the curve. Then go straight with doubled 21 gauge half round wire and bend across the bar. Wrap once on the bend and then start wrapping all the wires together; the 2, bended bar, bar and doubled 21 gauge wires. Wrap tight and use the nylon jawed pliers to pull tight and flatten as you go. (You will reach spots near bends where you must wrap without going around the "u" shaped wire. Wrap then to leave no space as you don't want to drag the wire across.) Repeat on the other side of cuff.


Step 27
Using 1 1/4 inch dowel rod and cutting board, roll each side inward with the dowel to shape the cuff. This is an example of a small cuff.


Step 28
Congratulations! Your cuff is now complete!
Supply Detail
loading...
Change Metal:
This Pattern requires:
Purchase quantity:
Price: $
Gold Club Price: $
Purchase quantity:
Price: $
Gold Club Price: $
Other Patterns by Cynthia Wyatt
 Beginners Infinity Bracelet
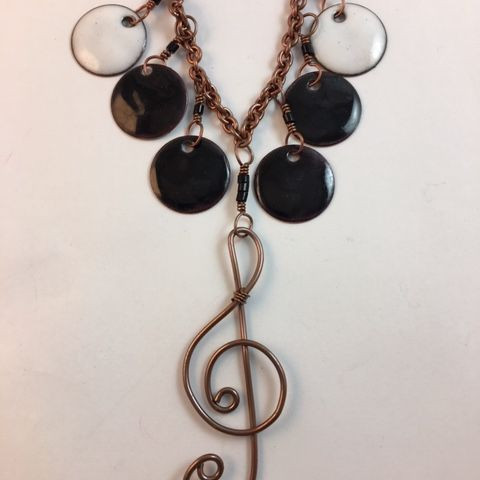
 Infinity Pendant
![]()
The premier place for all your jewelry making needs. The best in wire, tools, cabochons, gemstone beads and more. As well as a superior resource for educational support to help build your jewelry making skills and techniques.
Connect With Us


® 2007 - 2025 JewelryMaking.com Powered by ClaimTheWeb Cart

4.7
JewelryMaking.com
45619 Reviews
