
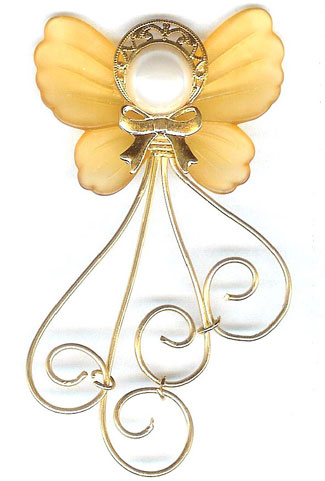
Lighting the Way Angel Pin
- Category: Classic
- Technique(s): Wrapping
- Skill Level: Beginner
Making this angel should be a labor of love. Pick out a vintage earring in a color you love or button with rhinestones then pick out a chandelier drop of the same color. Find a butterfly that allows your stones to shine. Adding a bow gives it a professional finish. You can use silver, gold, or copper wire to make your treasure. As I tell my classes, sometimes the thrill of the hunt for the items makes it even more special.
Materials

20 Gauge Round Half Hard .925 Sterling Silver Wire
H8-20H
- Lesson Quantity: 40.00 inches
- Purchase Quantity: 2.00 25FT
- Price: $73.15
- Gold Club Price: $54.86

21 Gauge Half Round Half Hard .925 Sterling Silver Wire
H8-21HRH
- Lesson Quantity: 10.00 inches
- Purchase Quantity: 1.00 1FT
- Price: $1.11
- Gold Club Price: $0.84

45x40mm butterfly wings
- Lesson Quantity: 1.00 pieces
- Purchase Quantity: 1.00 each

chandelier dangle or drilled bead 30x50mm
- Lesson Quantity: 1.00 pieces
- Purchase Quantity: 1.00 each

Bow approximately 20x40mm
- Lesson Quantity: 1.00 pieces
- Purchase Quantity: 1.00 each

Tie tac back finding
- Lesson Quantity: 1.00 pieces
- Purchase Quantity: 1.00 each
Tools

C.H.P Milano Italian Flush Cutter, 5 1/2 Inches
PLR-487.00
- PLR-487.00
- Lesson Quantity: 1.00 pieces
- Purchase Quantity: 1.00 each
- Price: $14.97
- Gold Club Price: $11.23

E6000 Adhesive Glue 3.7 oz. - Pack of 1
G16-18
- G16-18
- Lesson Quantity: 1.00 pieces
- Purchase Quantity: 1.00 each
- Price: $9.57
- Gold Club Price: $7.18

Chain Nose Wire Plier
G2-508
- G2-508
- Lesson Quantity: 1.00 pieces
- Purchase Quantity: 1.00 each
- Price: $32.95
- Gold Club Price: $24.71

Flat Nose Wire Plier
G2-506
- G2-506
- Lesson Quantity: 1.00 pieces
- Purchase Quantity: 1.00 each
- Price: $32.95
- Gold Club Price: $24.71

Round Nose Wire Plier
G2-507
- G2-507
- Lesson Quantity: 1.00 pieces
- Purchase Quantity: 1.00 each
- Price: $32.95
- Gold Club Price: $24.71
Instructions
Step 1
Lay out your wire and form to the shape of the chandelier. Use the half round wire for stability as you form the wire. Measure from the center of the wire 1 ¼" to the left and right. Make 3 wraps each. Then measure up the sides from that wrap 2" and make 3 wraps on the left and right. Then take all 8 wires and wrap them together using 3 more wraps. It should look like the picture.

Step 2
Now insert the chandelier making sure the cage is secure. Take the end of the top wrap wire and insert it through the hole at the top of the chandelier. Bring the end up and just under the other wraps at the top. Secure the end with another wrap. Don't worry, they won't show. This will ensure the chandelier will not pop out of the cage.

Step 3
In this step you will do two things. Take the 7 wires left at the top and cut 3 away close to the top wrap. The 4 remaining wires will be used to mount the earring or button. Then take the flat nose pliers and make a bend in the front wire at the bottom on both sides. (Sort of a horseshoe design.) Perform this on the front and back wire. This adds the final touch to the cage and will help hold the chandelier secure.

Step 4
Glue the earring or button to the four wires at the top of the chandelier with E6000 glue. Place it as close to the top wrap wires as possible. Let rest to dry according to glue directions.

Step 5
Now glue the head and body to the wings as shown below. Allow glue to dry.

Step 6
You are almost there. Glue the bow you have chosen just under the face of the angel.

Step 7
For the final step, take the tie tac and glue it just behind the head. It should be centered for balance and will wear beautifully. Wear and enjoy!






 Bound for Glory Angel Pin
 Heaven Rejoices Angel Pin


