
Mesh Stenciled Enamel Necklace
- Category: Enamel
- Technique(s): Enamel
- Skill Level: Intermediate
There are lots of fun things you can use as a stencil for overlay on already stenciled pieces. In this necklace, I used nylon mesh.
Materials

Paper patterns of your choice. https://www.wirejewelry.com/jewelry_making_tips_techniques/Graph-Paper-Patterns-for-Jewelry_232.html
- Lesson Quantity: 1.00 pieces
- Purchase Quantity: 1.00 each

rubber cement
- Lesson Quantity: 1.00 pieces
- Purchase Quantity: 1.00 each

Decorative Craft Mesh (type used to make wreaths, etc.)
- Lesson Quantity: 1.00 pieces
- Purchase Quantity: 1.00 each

Opaque Counter Enamel C3 or other Opaque
- Lesson Quantity: 1.00 pieces
- Purchase Quantity: 1.00 each

Opaque Enamels of your choice
- Lesson Quantity: 1.00 pieces
- Purchase Quantity: 1.00 each

22 Gauge 0.025 Dead Soft Copper Sheet Metal - 6x12 Inch
MET-705.22M
- Lesson Quantity: 1.00 pieces
- Purchase Quantity: 1.00 each
- Price: $10.77
- Gold Club Price: $8.07

Gold Filled Jump Rings Open (.030) 20ga. (OD) 6mm (ID) 4.34mm - Pack of 10
J11-192
- Lesson Quantity: 1.00 pieces
- Purchase Quantity: 1.00 each
- Price: $6.20
- Gold Club Price: $4.65

Gold Filled Chain Cable Knurled 1.8x2mm - 10 Feet
C4-128U
- Lesson Quantity: 1.00 pieces
- Purchase Quantity: 1.00 each
- Price: $53.87
- Gold Club Price: $40.40

Gold Filled Lobster w/ Ring 14x5mm - Pack of 1
J3-78
- Lesson Quantity: 1.00 pieces
- Purchase Quantity: 1.00 each
- Price: $6.34
- Gold Club Price: $4.76
Tools

Klyr-Fire Holding Agent for Enamel
G11-7
- G11-7
- Lesson Quantity: 1.00 pieces
- Purchase Quantity: 1.00 pieces
- Price: $12.95
- Gold Club Price: $9.71

NATURES TOUCH CITRIC PICKLE, 2LB PLASTIC JAR
CLN-163.00
- CLN-163.00
- Lesson Quantity: 1.00 pieces
- Purchase Quantity: 1.00 each

Pickle Pot, 16 Ounces
CLN-584.00
- CLN-584.00
- Lesson Quantity: 1.00 pieces
- Purchase Quantity: 1.00 each
- Price: $30.97
- Gold Club Price: $23.23

140 Grit (Medium-Fine) Diamond Sawblade - Pack of 1
G18-9
- G18-9
- Lesson Quantity: 1.00 pieces
- Purchase Quantity: 1.00 each
- Price: $8.97
- Gold Club Price: $6.73

4 Saw Frame with Tension Screw
SAW-334.00
- SAW-334.00
- Lesson Quantity: 1.00 pieces
- Purchase Quantity: 1.00 each
- Price: $21.97
- Gold Club Price: $16.48

Blazer Big Buddy Turbo Torch, Black
TRCH-8010
- TRCH-8010
- Lesson Quantity: 1.00 pieces
- Purchase Quantity: 1.00 each
- Price: $40.00
- Gold Club Price: $30.00

Fire Brick
SOL-485.00
- SOL-485.00
- Lesson Quantity: 1.00 pieces
- Purchase Quantity: 1.00 each
- Price: $11.97
- Gold Club Price: $8.98

Thompson 1.25 Inch Trivet - Pack of 3
G11-2
- G11-2
- Lesson Quantity: 1.00 pieces
- Purchase Quantity: 1.00 pieces
- Price: $11.25
- Gold Club Price: $8.44

Straight Copper Tongs
TWZ-958.00
- TWZ-958.00
- Lesson Quantity: 1.00 pieces
- Purchase Quantity: 1.00 each
- Price: $10.57
- Gold Club Price: $7.93

Thompson 40 Mesh Sifter Small - Pack of 3
G11-4
- G11-4
- Lesson Quantity: 1.00 pieces
- Purchase Quantity: 1.00 pieces
- Price: $15.95
- Gold Club Price: $11.96
Instructions
Step 1
Safety: Please work responsibly for your own safety in your enameling studio. At a minimum, this includes the wearing dark safety glasses when using the torch and a dust mask at least when sifting. A fire extinguisher should also be close at hand.
I torch enamel with a trivet atop a fire brick on a fire-proof surface using an oxygen/propane torch. Please use the enamel set up and torch that works best for you. If you have interest, you can see my set up at https://www.wirejewelry.com/jewelry_making_patterns_tutorials/Torch-Enameling-with-Opaque-Enamels_300.html
I torch enamel with a trivet atop a fire brick on a fire-proof surface using an oxygen/propane torch. Please use the enamel set up and torch that works best for you. If you have interest, you can see my set up at https://www.wirejewelry.com/jewelry_making_patterns_tutorials/Torch-Enameling-with-Opaque-Enamels_300.html
Step 2
Create a paper pattern for each piece and rubber cement it to 24g copper sheet. I've worked with squares, rectangles and circles for different necklaces. Saw out each pattern. I have used my disk cutter for some of the shapes.


Step 3
Punch holes on each side of the pieces positioning them slightly above the middle.

Step 4
Take the patterns off the metal and be sure to remove all the rubber cement from the pieces. Use pliers to give each one a gentle curve towards the back to strengthen them.

Step 5
Sift and torch fire two coats of Opaque Counter Enamel on each piece. It seems to me that when there is a cut out in the interior of a piece, it takes a longer firing time; so be patient and make sure you fire to maturity.

Step 6
Allow the enamel to cool a bit and then quench and pickle each piece. (I don't normally pickle the counter enameled pieces, however, since these have cut outs in the interior, I need to in order to avoid getting any fire scale on the piece.


Step 7
After sifting and firing two coats of your chosen base coat on each piece, pickle them again. (Note: You will likely see new fire scale on the cut-out areas of the pieces and need to remove it.)

Step 8
Use a swatch of craft mesh to create a stencil for the pieces. I like the mesh with wider lines, shown in green here, as opposed to the mesh with narrow lines.


Step 9
Working with one necklace piece at a time, spray the piece with Klyrfire before putting the mesh atop it. (If you put the mesh on first and spray, the enamel will gum up on the mesh.)

Step 10
You need to hold the mesh down as tightly as possible with your fingers. Sift the contrasting opaque atop the mesh. I usually give the Klyrfire at least 30 seconds to dry before removing the mesh and then pull the mesh off in one motion.


Step 11
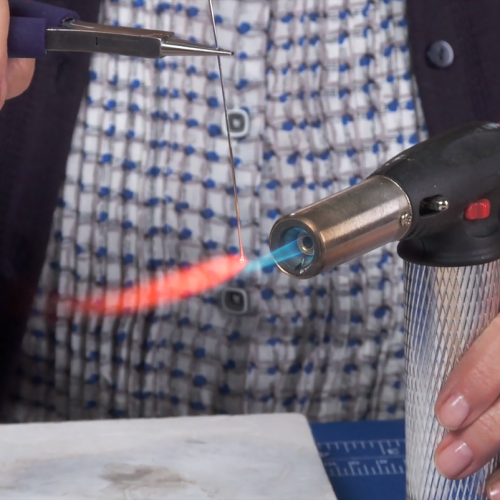
After the Klyrfire is completely dry, torch fire the piece.

Step 12
Note: You can add more than one mesh stencil if you want. For example, the piece below has Flame Red sifted and fired first and then I sifted and fired a small area with Sky Blue.


Step 13
Rinse the enamel off the mesh in the quench water and be sure it is completely dry before reusing it so the enamel doesn't gum up on it.

Step 14
Repeat this process for each piece using colors of your choice. Put the pieces together with jump rings and finish the necklace with chain and a clasp. I used Liver of Sulfur to patina one of the necklace chains and rings below.






 Pattern Wire Earrings
 Infinity Link Bracelet
 Ellipse Earrings
 Geometric Earrings
 Smile Cluster Necklace
 Stone Twist Wrap
 Loopy Loo Graduated Wire Bracelet
 Torch Fired Crackle Enamel Earrings
 Torch Fired Separation Enamel
 Link-it Necklace
 Taco Earrings
 Dimensional Wire Cuff
 Torch Enameling with Opaque Enamels
 Crackle Enamel and Sgraffito Pendant
 Torch Enameled Stencil Earrings
 Criss Cross Wire Wrap
 Torch Fired Sgraffito Earrings


