
Torch Enameling with Opaque Enamels
- Category: Enamel
- Technique(s): Butane Torch Techniques, Enamel
- Skill Level: Beginner
Using opaque enamels is a basic, beginner technique. It's a good way to get familiar with the feel of enameling with a torch. I'll go over the set-up and safety so you can feel confidant in your learning this skill.
Materials

Copper Oval, 24 Gauge, 18 by 13 Millimeters, Pack of 6
MET-520.20
- Lesson Quantity: 2.00 pieces
- Purchase Quantity: 1.00 each
- Price: $2.97
- Gold Club Price: $2.23

opaque enamel spruce green
- Lesson Quantity: 1.00 pieces
- Purchase Quantity: 1.00 each

Counter enamel
- Lesson Quantity: 1.00 pieces
- Purchase Quantity: 1.00 each

opaque enamel threads
- Lesson Quantity: 1.00 pieces
- Purchase Quantity: 1.00 each

Klyr-Fire Holding Agent for Enamel
G11-7
- Lesson Quantity: 1.00 pieces
- Purchase Quantity: 1.00 pieces
- Price: $12.95
- Gold Club Price: $9.71
Tools

Thompson 1.25 Inch Trivet - Pack of 3
G11-2
- G11-2
- Lesson Quantity: 1.00 pieces
- Purchase Quantity: 1.00 pieces
- Price: $11.25
- Gold Club Price: $8.44

Thompson 40 Mesh Sifter Small - Pack of 3
G11-4
- G11-4
- Lesson Quantity: 1.00 pieces
- Purchase Quantity: 1.00 pieces
- Price: $15.95
- Gold Club Price: $11.96

Cross Locking Tweezers with Groove for Wire
TWZ-738.00
- TWZ-738.00
- Lesson Quantity: 1.00 pieces
- Purchase Quantity: 1.00 each
- Price: $4.97
- Gold Club Price: $3.73

Fire Brick
SOL-485.00
- SOL-485.00
- Lesson Quantity: 1.00 pieces
- Purchase Quantity: 1.00 each
- Price: $11.97
- Gold Club Price: $8.98

Blazer Big Shot Torch
TRCH-8000
- TRCH-8000
- Lesson Quantity: 1.00 pieces
- Purchase Quantity: 1.00 each
- Price: $89.95
- Gold Club Price: $67.46

SANDING SPONGES ASST- 5PC- 1EA GRIT 100-400
ABR-600.90
- ABR-600.90
- Lesson Quantity: 1.00 pieces
- Purchase Quantity: 1.00 each

alundum stone
- Lesson Quantity: 1.00 pieces
- Purchase Quantity: 1.00 each

Safety Glasses
G21-1
- G21-1
- Lesson Quantity: 1.00 pieces
- Purchase Quantity: 1.00 pieces
- Price: $2.97
- Gold Club Price: $2.23

Face Mask - Pack of 50
G21-2
- G21-2
- Lesson Quantity: 1.00 pieces
- Purchase Quantity: 1.00 pieces
- Price: $5.97
- Gold Club Price: $4.48

Cool Cup
SOL-700.00
- SOL-700.00
- Lesson Quantity: 1.00 pieces
- Purchase Quantity: 1.00 pieces
- Price: $15.97
- Gold Club Price: $11.98
Instructions
Step 1:
Appropriate torches
Pro Tip: Most torches are appropriate for use on this project. The exception is the tiny butane torches which may not provide enough heat. The large flame butane torch (shown in the tutorial photos) works fine as long as the piece you are enameling remains less than about 1 1/4 inches in diameter (or a total area of about 1 1/4 square inches). We are firing three or four coats for this tutorial. If you add very many additional coats, it may be more difficult to use the butane torch. If you are using a butane torch, keep it filled as I have found the flame is weaker as the fuel is used. You may still have enough fuel to produce a flame; however, that flame will not be as potent.
Step 2:
Torch Station Set-up
Pro Tip: There are other ways to set up a torch station and you should use what works best for you. This is simply the way I like to torch fire.
Work on a fire-proof surface large enough that if a red-hot piece fell onto the work space it would land on this safe surface. Also consider the floor below your work surface. A hot piece may fall to the floor and you don't want it to ignite carpeting or anything else flammable. You WILL drop some pieces.
Place the fire brick on the fire-proof surface. Stand the brick on end so that it is tall.
The trivet will eventually go atop the fire brick.
Place the torch beside the fire brick on the side of your nondominant hand. For example, I am right-handed and my torch is on the left side of the brick (my nondominant hand side).
Put the tweezers on the dominant hand side of the brick.
The quench bowl (bowl of water) also goes on the dominant hand side but does not have to be on the fire-proof surface.
You also need a small area on either side of your station where you can sift enamel onto your piece.

Step 3:
Safety
Pro Tip: You are in charge of your own safety and the protection of your surroundings. While I am making suggestions herein, it's impossible to be sure I have mentioned all the common-sense measures that your situation requires.
Please consider that you are working with fire and fuel. I do not let children into my work area when I'm torching and suggest you free yourself of other distractions. Please don't answer the phone while your torch is flaming!
If you have filled your torch with fuel, put the fuel can under your torch station or far enough away that there's no chance it will come in contact with a flame. You do not want any paper or paper towels near the vicinity of the flame. Again, these are flammable.
Always wear safety glasses while using a torch.
Wear a mask while sifting enamel. Fines from the enamel escape into the air during sifting and although you can't see them, you will not want to inhale them. You may want to leave the mask on while using the torch as well.
Wear a protective apron. I wear a leather apron purchased at a welding store; however, for years I wore an old kitchen apron. A hot piece that falls on clothing will burn a hole.
If you have long hair, tie it back.
Please do not wear a garment with long loose sleeves that might find their way to the flame.
The quench bowl (bowl of water) is a safety guard. If you see an errant flame or detect some scorching, dump the water on the spot.
Be sure you have a working fire extinguisher available near the torching area.
Step 4:
Procedure
If you are using purchased pre-cut shapes, you can skip these first few steps. Otherwise, you can design and draw your own shape or use the pattern provided herein. Spread rubber cement on the back of the pattern and the copper.

Step 5
Allow both the paper and the copper to dry and then stick them together.
Use metal cutters or a jewelry saw to cut out the pieces


Step 6
Use a hole punch or rotary tool to create a hole in the piece positioning it at the point where it will hang.

Step 7
Sand all edges and wipe off any rough spots on the pieces.
NOTE: At this point, some enamellists clean the metal using Penny Brite or another product. I have found that this is not needed on these pieces.
NOTE: At this point, some enamellists clean the metal using Penny Brite or another product. I have found that this is not needed on these pieces.

Step 8
Prepare to counter enamel the back of the piece by placing a piece of paper or a single magazine page on a work surface. The paper catches the excess enamel and you can use it to put this back in the jar when you finish with a color.

Step 9
Hold a piece on your fingers above the enamel container and use a sifter to filter the enamel down onto the back of the piece. Begin sifting CE3 (counter enamel) or another opaque enamel around the edge of the piece and continue working your way toward the middle until it is covered. You can either gently tap the sifter handle or scratch it. Counter enamel is needed to help keep the piece from warping and cracking.


Step 10
Place the piece atop a trivet. Carefully move it to a corner of the fire brick positioning it so that as much as possible of the piece balances over the edge and can be reached directly with the torch.


Step 11
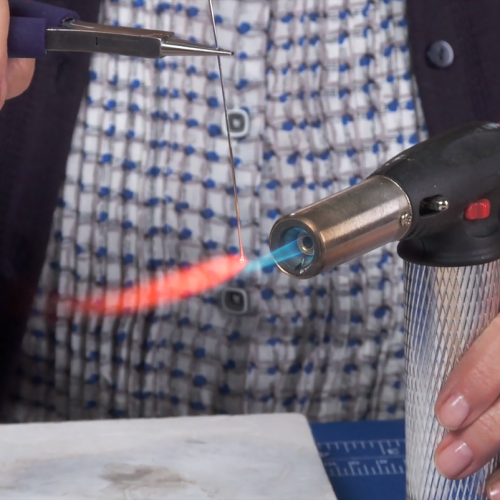
Ignite the torch and hold it in your non-dominant hand. Fire from under the piece as you gently move the flame back and forth to achieve even heating. Continue firing until the whole piece has a reddish glow and reaches a glossy stage.


Step 12
Use the tweezers to careful remove the piece from the trivet. While holding the piece with the tweezers, sift a second coat of counter enamel on the piece. If this is too precarious, simply wait for the piece to cool and hold the piece on your fingers.
Return the piece to the trivet and repeat steps 10 and 11.
Return the piece to the trivet and repeat steps 10 and 11.


Step 13
Remove the piece from the trivet using the tweezers and place it on the fire-proof surface to cool. Go ahead and counter enamel the second piece (steps 9-13) while you wait for the first to cool.

Step 14
Quench and dry the pieces in your bowl of water to remove the fire scale that has formed on the opposite side and edges of the pieces. The pieces don't have to be completely cool prior to quenching; however, if you quench while one is still very hot the enamel may crack.
You will see that the flame has changed the look of the copper on the side that is not counter enameled. This is normal and nothing to worry about.
You will see that the flame has changed the look of the copper on the side that is not counter enameled. This is normal and nothing to worry about.

Step 15
Repeat Steps 9-14 on the top of each piece using your chosen opaque. The photos show a piece on which I used opaque 1430 Spruce Green. Note: As you enamel the top of the piece, the flame is directed at the counter enamel. In my opinion, it is a good idea to gradually heat this to help preserve the counter enamel. I begin firing the top coat well below the piece on the trivet and gradually work my way up close to the piece.


Step 16
Check your piece to see if one coat of enamel seems sufficient. If not add a second coat of the same color.

Step 17
Optional: You can add enamel threads (aka cat whiskers) to your pieces if desired. Paint Klyr-fire atop the cooled pieces.
Carefully place the threads on the pieces and let them dry completely before firing. This drying takes longer than you might expect.
Fire the dried pieces. If you see any bubbling, wait for further drying. This firing will take considerably longer than the other steps as it takes time for the threads to melt. You want them to sink down into the coat of enamel below.


Step 18
If the edges of the pieces are rough, use an alundum stone and a bit of water to gently smooth them.

Step 19
Add ear wires and you are ready to wear your creation.






 Mesh Stenciled Enamel Necklace
 Infinity Link Bracelet
 Ellipse Earrings
 Geometric Earrings
 Smile Cluster Necklace
 Stone Twist Wrap
 Loopy Loo Graduated Wire Bracelet
 Torch Fired Crackle Enamel Earrings
 Torch Fired Separation Enamel
 Link-it Necklace
 Taco Earrings
 Dimensional Wire Cuff
 Crackle Enamel and Sgraffito Pendant
 Torch Enameled Stencil Earrings
 Criss Cross Wire Wrap
 Torch Fired Sgraffito Earrings
 Pattern Wire Earrings


